Wii U - System Font Customisation Guide
A guide for customising the system-wide font on the Wii U.
Getting Started
Aroma custom firmware is required to use the mod. Install CFW if you haven't already.
No system files in the MLC NAND are modified in the process. The custom system font is loaded into RAM only, so it's safe to install a custom system font without worrying about bricking the console.
What You Need:
-
A font you want to install on a Wii U (TTF or OTF)
Recommended OS: Windows 10 or 11, Linux
Merging the Fonts
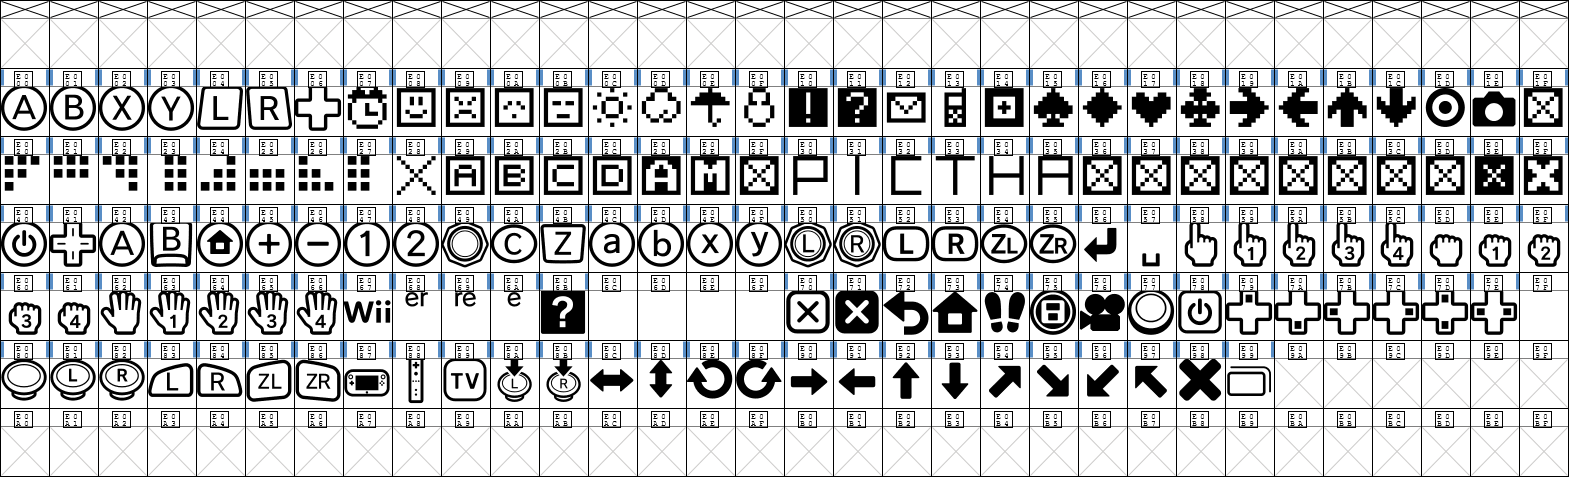
A Wii U font will be merged into a custom system font so the icon glyphs are preserved.
There are 2 ways to merge the fonts: CLI & GUI
The CLI method involves in using a Python script that calls the FontForge program to merge the fonts automatically, while the GUI method involves in using FontForge itself to merge the fonts manually.
The CLI method process is shorter than the GUI method. If the CLI method does not work for you, try the GUI method instead.
-
Go to the Wii U System Font Replacer plugin repository.
-
Download a Python script:
merge-fonts.py -
Place those 3 files in a folder:
-
merge-fonts.py -
Wii U font -
nintendo_NTLG-DB_002.ttf -
A custom font - In this case:
PopHappiness.ttf(OTF also works)
-
-
Launch the Terminal app by right-clicking on File Explorer's empty space and clicking
Open in Terminal.
-
Input this command (pick one):
Windows - PowerShell:
& 'C:\Program Files (x86)\FontForgeBuilds\bin\fontforge.exe' merge-fonts.py PopHappiness.ttf nintendo_NTLG-DB_002.ttf PopHappiness_Merged.ttf
Windows - Command Prompt (CMD):
"C:\Program Files (x86)\FontForgeBuilds\bin\fontforge.exe" merge-fonts.py PopHappiness.ttf nintendo_NTLG-DB_002.ttf PopHappiness_Merged.ttf
Linux:
fontforge merge-fonts.py PopHappiness.ttf nintendo_NTLG-DB_002.ttf PopHappiness_Merged.ttf
Those are single line commands - they are wrapped so the whole commands are displayed for easy copy without horizontally scrolling.
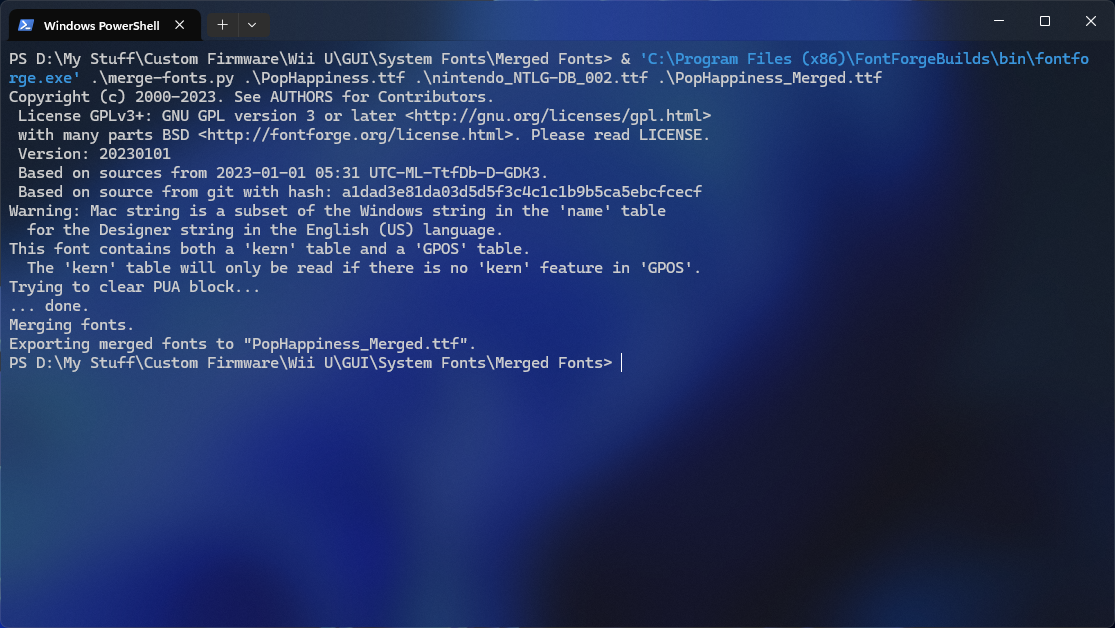
The fonts have been merged as
PopHappiness_Merged.ttf.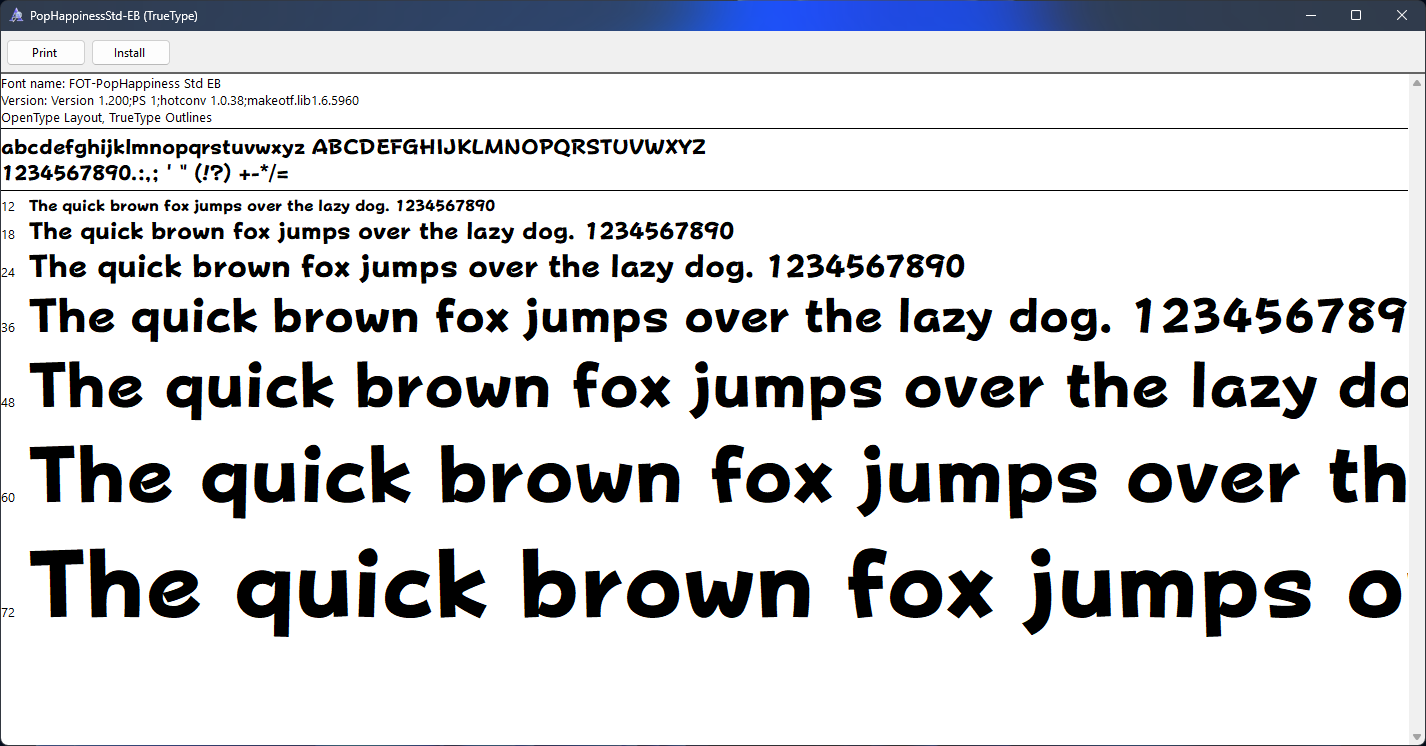
-
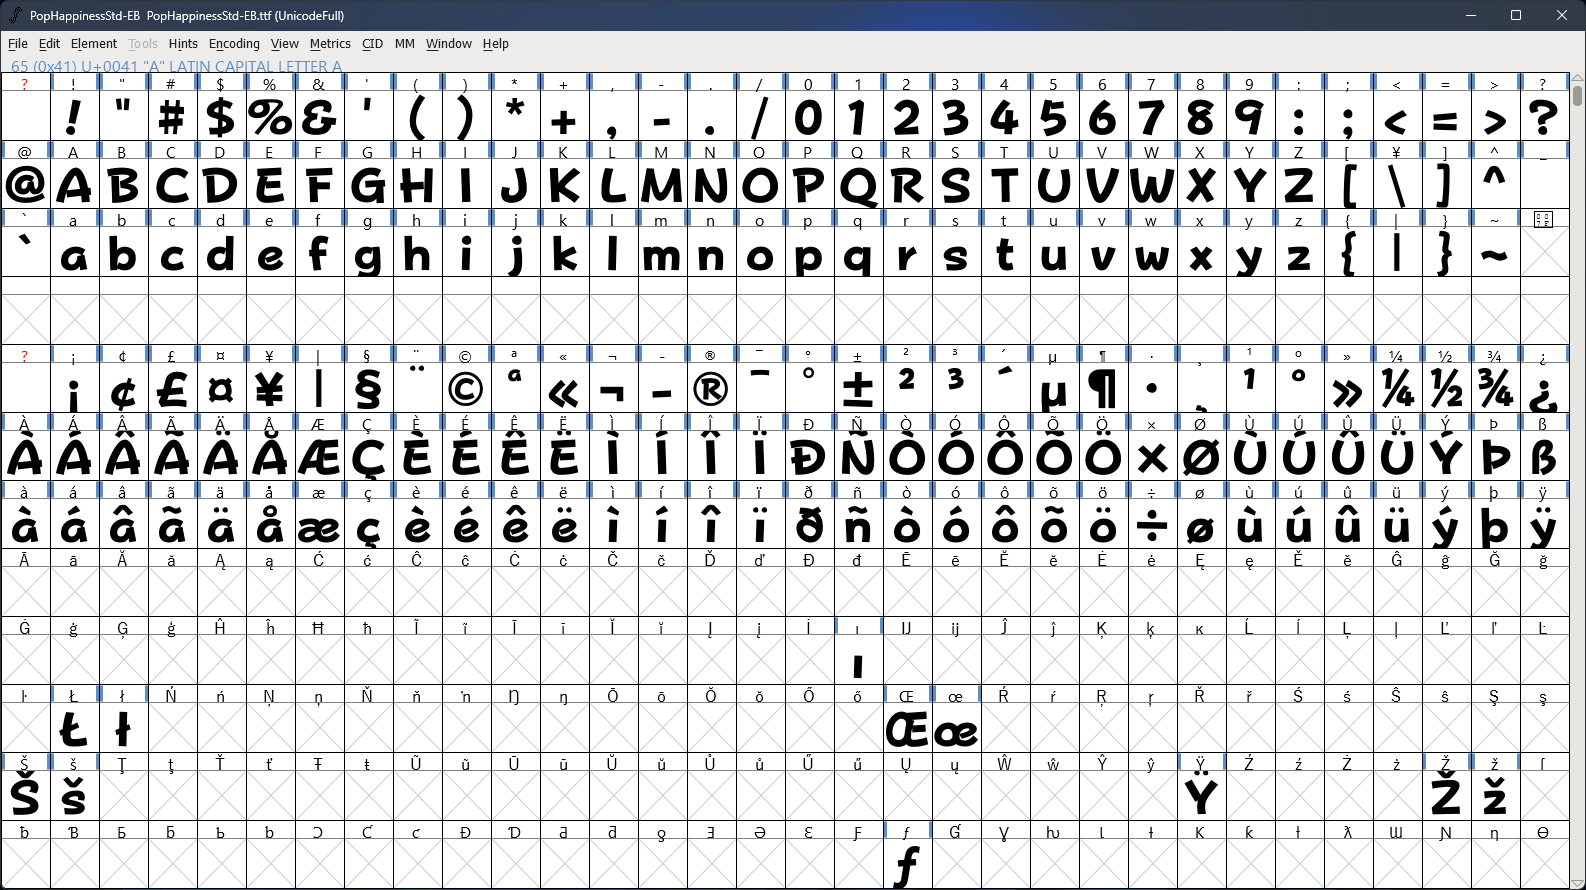
Launch FontForge.
-
Open the custom font file (TTF/OTF).
-
Go to
Element→Font Info...→General. -
Set the
Em Sizevalue to1000and clickOK. The custom font size will be adjusted so it matches the Wii U font size. Skip if the em size is already 1,000.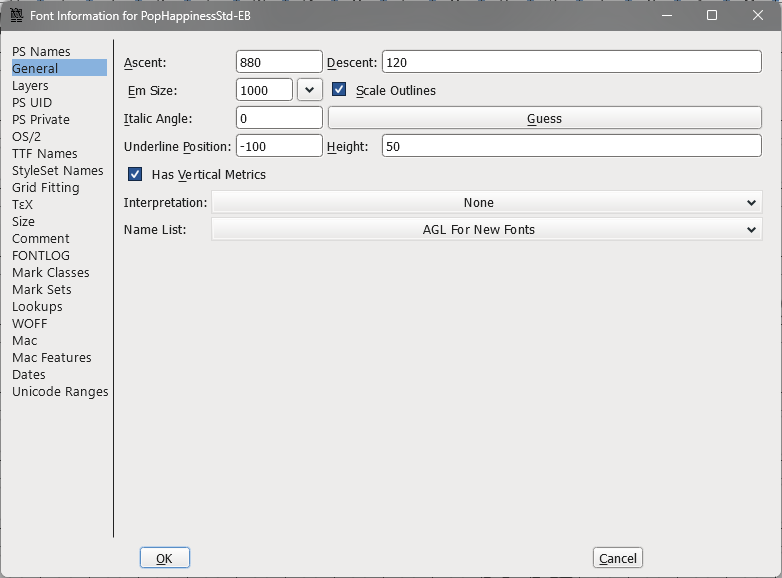
-
Go to
View→Goto, inputU+E000into the text box to jump to the Private Use Area block. -
If the custom font contains any non-Wii U glyphs in the PUA block, go to
File→Execute Script, input this code into the text box:fontforge.activeFont().selection.select(("ranges", None), 0xE000, 0xE099) fontforge.activeFont().clear()and click
OK. This will clear out all the non-Wii U glyphs in this block.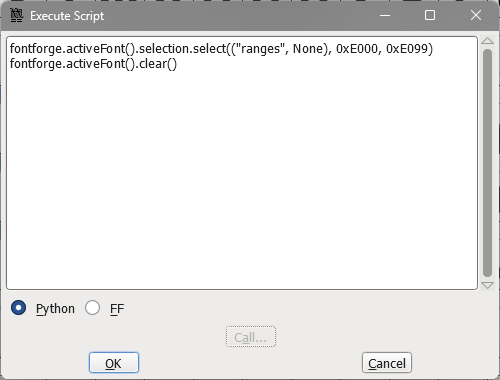
-
Go to
Element→Merge Fonts...and select a Wii U font file. -
Click
Yeswhen prompted to retain kerning info.
-
Go to
File→Generate Fonts.... -
Pick
TrueTypein the combo-box, uncheckValidate Before Saving, then clickGenerate.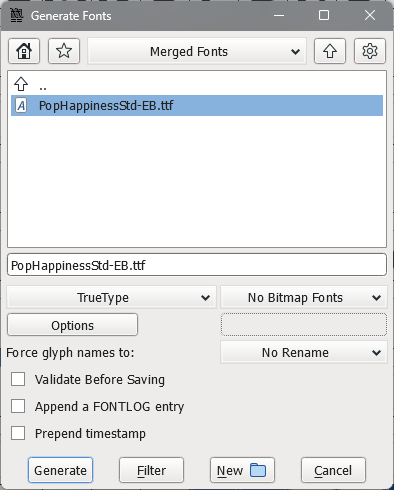
-
On a File Explorer window, open the merged font file.
-
Make sure the outlines format is
TrueType Outlines. ThePostScript Outlinesfonts won't work with Wii U, you must generate a font as TTF. -
TrueTypeorOpenTypeon the window title bar doesn't matter, as long as its outlines format is TrueType Outlines.
-
Installing the Custom System Font
-
Add a merged font file to
SDCARD:/wiiu/fonts. -
Open the Plugin menu (
L+D-Pad ↓+Select). -
Go to System Font Replacer.
-
Activate this plugin.
-
Select a merged font file for Standard font.
-
Disable
Use custom fonts only for Wii U Menuto apply the font system-wide. -
Reboot the console.
The custom system font has been installed!
You can also install the custom system font to Cemu emulator.
The font files in /Cemu/resources/sharedFonts are replacement
system fonts which are used if the real system fonts don't exist in a
virtual MLC NAND.
Do not add the custom/real system fonts to this folder, as those added
fonts will be overwritten with replacement ones after Cemu updates.
Instead, the custom/real system fonts should be added to a virtual MLC
NAND.
-
Rename the merged font file to
CafeStd.ttf. -
Launch Cemu.
-
Go to
File→Open MLC folder. -
Navigate to
/sys/title/0005001b/10042400/content. Create folders if those don't exist. -
Add a
CafeStd.ttffile here. -
Launch any of the system apps (if installed) and see how the custom system font looks.
The custom system font has been installed!
Restoring the System Font
-
Open the Plugin menu (
L+D-Pad ↓+Select). -
Go to System Font Replacer.
-
Turn off this plugin.
-
Reboot the console.
The system font has been restored.
-
Launch Cemu.
-
Go to
File→Open MLC folder. -
Navigate to
/sys/title/0005001b/10042400/content. -
Delete or rename the
CafeStd.ttffile. -
Launch any of the system apps (if installed) and see how the original system font looks.
The system font has been restored.