3DS - Home Menu UI Layout Customisation Guide
A guide for customising the Home Menu UI layout (BCLYT files) on the Nintendo 3DS.
If this is your first time modding the 3DS Home Menu, follow derberg's 3DS Home Menu Customization Guide for setup and assets extraction before proceeding.
We have a Discord server dedicated to 3DS system UI customisations:
Custom 3DS Assets
Ask us or me (AromaKitsune) for help with UI customisations.
Note: I don't run this Discord server.
Getting Started
Luma3DS custom firmware is required to use the mod. Install CFW if you haven't already.
No system files in the NAND are modified in the process. The Home Menu applet patch is loaded via LayeredFS, a Luma3DS feature that redirects games/apps assets to modded assets files in the SD Card without patching the ROMs or system files directly.
What You Need:
-
.NET Desktop Runtime 3.1 for Kuriimu2 to launch
-
DARC files, can be either compressed (
*_LZ.bin) or decompressed (*.LZ)
Preparing for UI Layout Customisation
Here’s a list of known layout files for customisation.
| File | Description |
|---|---|
launcher.LZ/blyt/LncBase_U_00.bclyt |
Top screen layout - "L+R" caption, notification caption,
suspended game info. For HUD's, those are stored in the
hud.LZ file.
|
launcher.LZ/blyt/LncBase_D_01.bclyt |
Bottom screen layout - The UI elements whose colours are not customisable by Themes are the applets |
hud.LZ/blyt/HudMenu_00.bclyt |
Top screen HUD's - date, time, battery, connection status, Play Coins & steps counter |
sleep.LZ/blyt/Slp_U_00.bclyt |
Sleep/Shutdown screen (top) |
sleep.LZ/blyt/Slp_D_00.bclyt |
Sleep/Shutdown screen (bottom) |
To find other layouts:
-
Launch Switch-Toolbox.
-
Drag & drop the
*.LZfile in the Switch-Toolbox window. -
Search for the
bclytfiles and open any of those to see what it looks like. You might know what those layouts are, based on their file names.
Once you found what you're looking for, you can close Switch-Toolbox.
If you're looking into editing the UI colours for sleep.LZ and
applet icons (launcher.LZ), I suggest checking out
derberg's 3DS Home Menu Customization guide for those, as hex-editing
the *.LZ files directly is easier.
Note: Once you import/replace any files into the *.LZ files,
the colour values are moved to different addresses.
See this section here.
Editing the UI Layout
-
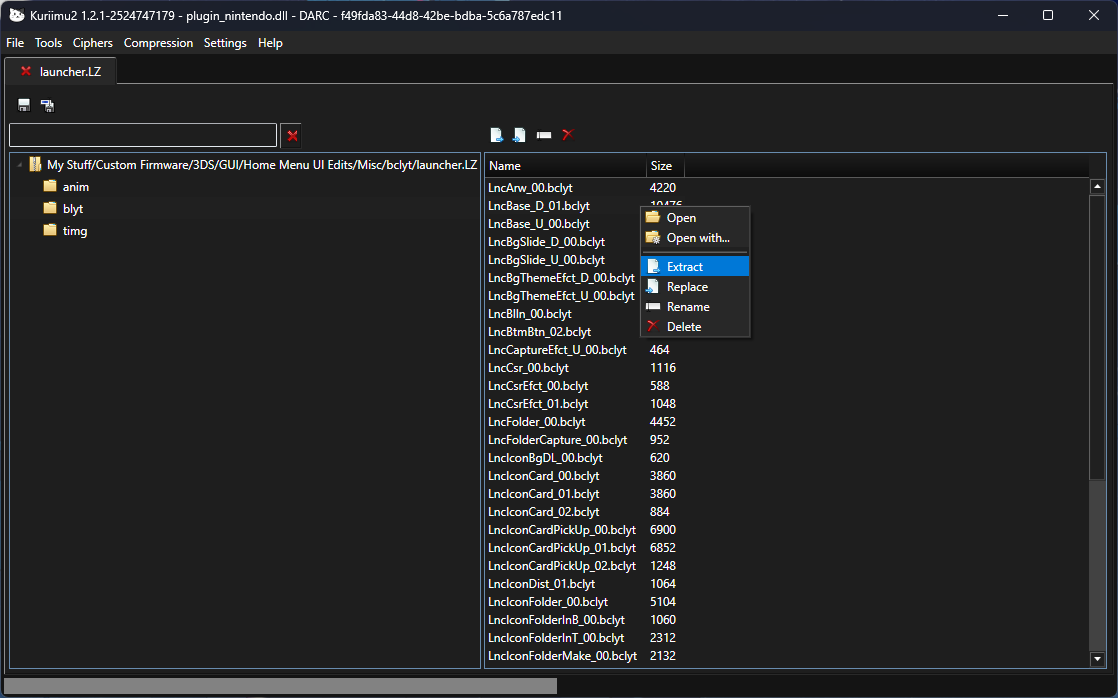
Launch Kuriimu2.
-
Drag & drop the
*.LZfile in the Kuriimu2 window.-
If it asks for a plugin, Kuriimu2 doesn’t support some archive files.
-
Taken from GitHub Actions and added here as a GitHub account is required to download artifacts so you don’t have to sign up just to download it :)
-
-
On the left pane, click the
blytfolder and the list of items should appear on the right pane. -
Extract the BCLYT file you want to edit.
-
Make 3 copies of the extracted BCLYT file, prepend
A-,B-andC-to each file name, for example:-
A-LncBase_D_01.bclytorA.bclyt -
B-LncBase_D_01.bclytorB.bclyt -
C-LncBase_D_01.bclytorC.bclyt -
To make the setup easier, create a batch file that automatically does that:
md bclyt
copy %1 bclyt\A.bclyt
copy %1 bclyt\B.bclyt
copy %1 bclyt\C.bclyt
Save it as
.bat/.cmd, drag & drop the BCLYT file in the batch file, enter the createdbclytfolder and move on to the next step.
-
-
Launch Switch-Toolbox.
-
Drag & drop the
B.bclytfile in the Switch-Toolbox window. -
Do not edit anything, just save.
Ctrl+Sisn’t coded to save in Layout Editor, so click the💾save button and the “saved” dialog should appear.- You should have the corrupted BCLYT file as its file size has been decreased. This is normal.
-
Close the layout editor window.
-
Drag & drop the
C.bclytfile in the Switch-Toolbox window. -
Edit any UI elements however you like.
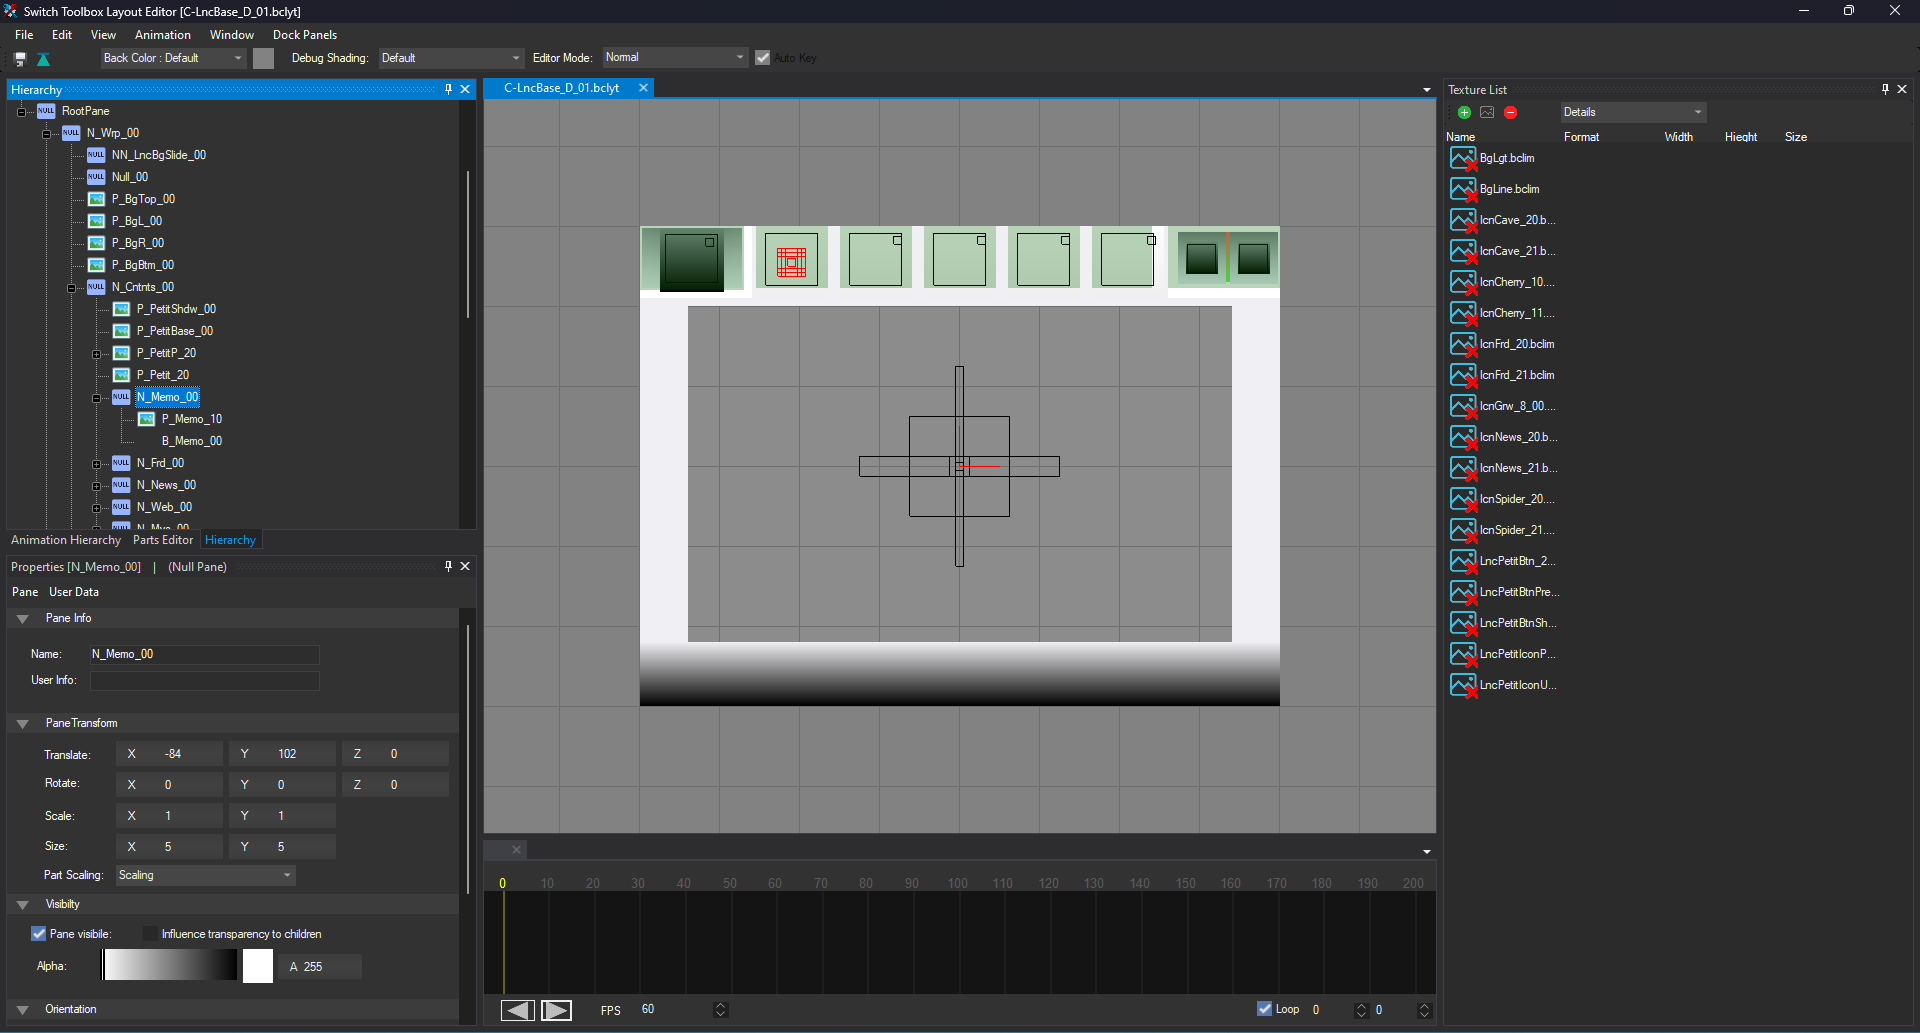
Click the screenshot for full view.-
Refer to the Assets Documentation for some lists of known panes to edit.
-
Each pane has its properties you can edit: positions (translate), size, colours, rotations, transparency, etc. You can even change the Picture Panes’ size, allowing you to import the BCLIM (Layout Image) files with larger dimensions.
-
To hide the UI elements, untick the
Pane visiblecheckbox and set theAlphavalue to0. -
If the UI elements don’t actually move to your desired position, then the elements’ position values are likely hardcoded in the BCLAN (Layout Animation) files and you have to edit them instead.
- One example of this case is the applets on the bottom screen - the
applets’ horizontal position values are hardcoded in
launcher.LZ/anim/LncBase_D_01_MvsToggle.bclan, this file is used for removing the Miiverse applet from the Korean 3DS systems. As a result, you can only move them vertically. To move them freely, edit the BCLAN file with Switch-Toolbox. Note: Hex editing isn’t needed as Switch-Toolbox doesn’t corrupt BCLAN files.
- One example of this case is the applets on the bottom screen - the
applets’ horizontal position values are hardcoded in
-
In order to keep the
C.bclyt’s file size the same asB.bclytfile’s, you should edit only the values in the Pane and Colors tabs. Adding or removing some items may change the file size which makes it more difficult to manually fix it with hex editor. Avoid doing the following edits:-
Adding new Panes
-
Deleting the existing Panes - It will crash Home Menu, so make them invisible instead.
-
Adding/removing links to textures in the Texture Maps tab
-
Editing the texts in the Text Pane - You should edit the MSBT files instead.
-
-
-
When done editing, click the
💾save button and you can close Switch-Toolbox.- You should have another corrupted BCLYT file. Again, this is normal. The
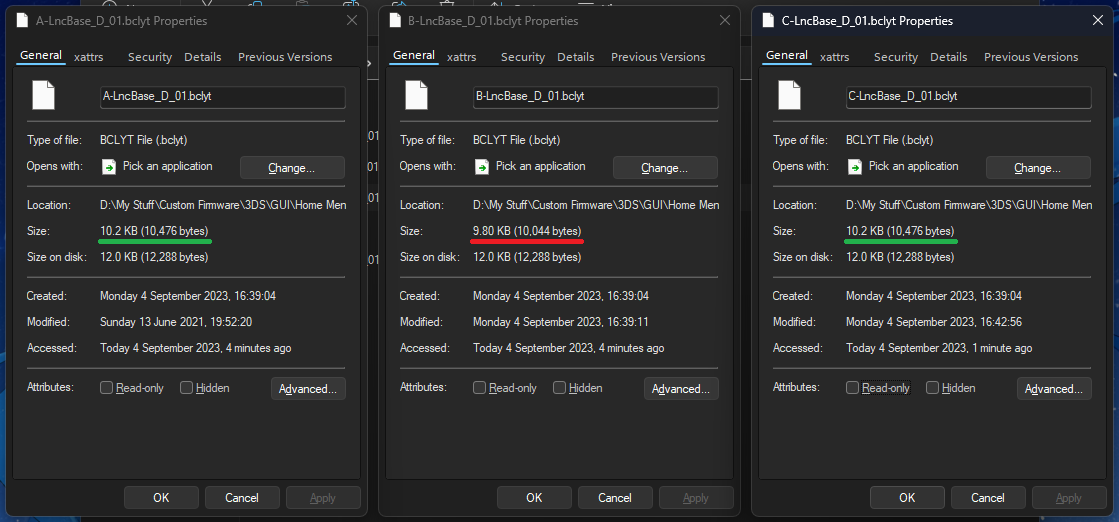
file size of the edited BCLYT file has been decreased by 432 bytes.
Make sure both the
B.bclyt’s andC.bclyt’s file sizes are the same. We will be restoring them on the next steps.
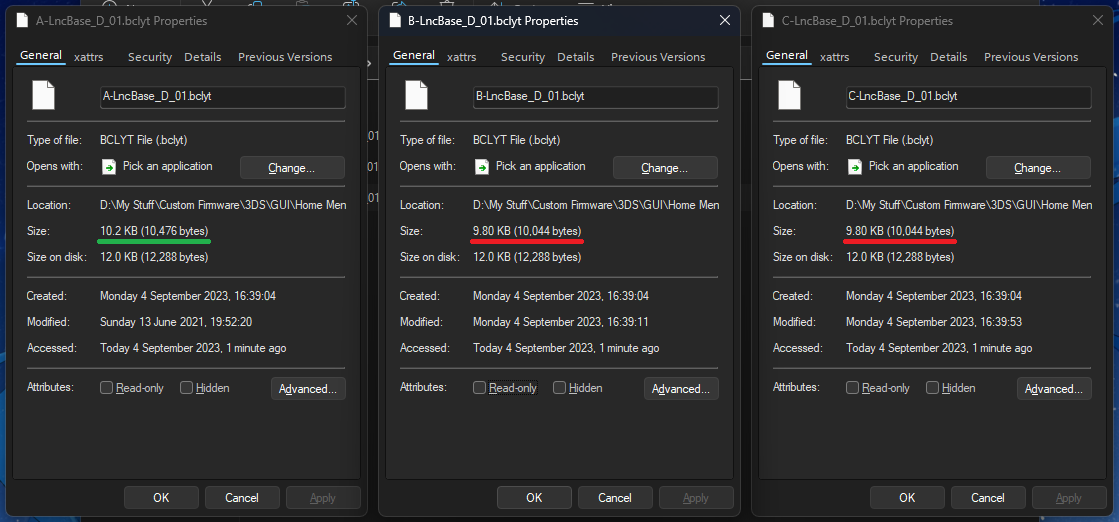
Click the screenshot for full view. - You should have another corrupted BCLYT file. Again, this is normal. The
file size of the edited BCLYT file has been decreased by 432 bytes.
Make sure both the
Fixing the UI Layout File
-
Launch HxD hex editor.
-
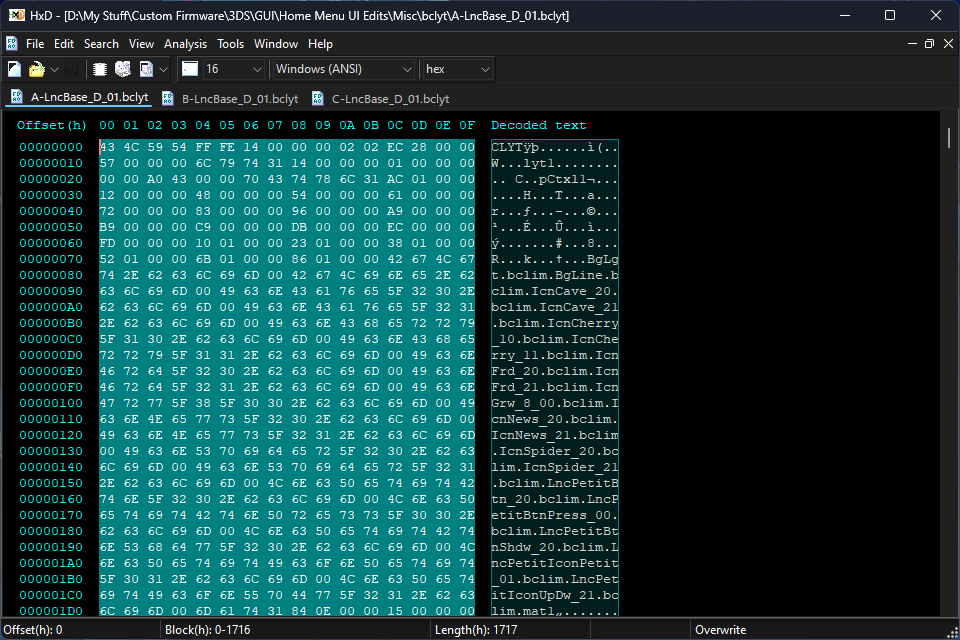
Drag those 3 BCLYT files in the HxD window. Make sure those tabs are in the correct order:
A.bclyt,B.bclyt,C.bclyt. -
Click the
C.bclyttab, then theB.bclyttab. -
Press
Ctrl+Kto compare between theB.bclyt&C.bclytfiles, clickOK.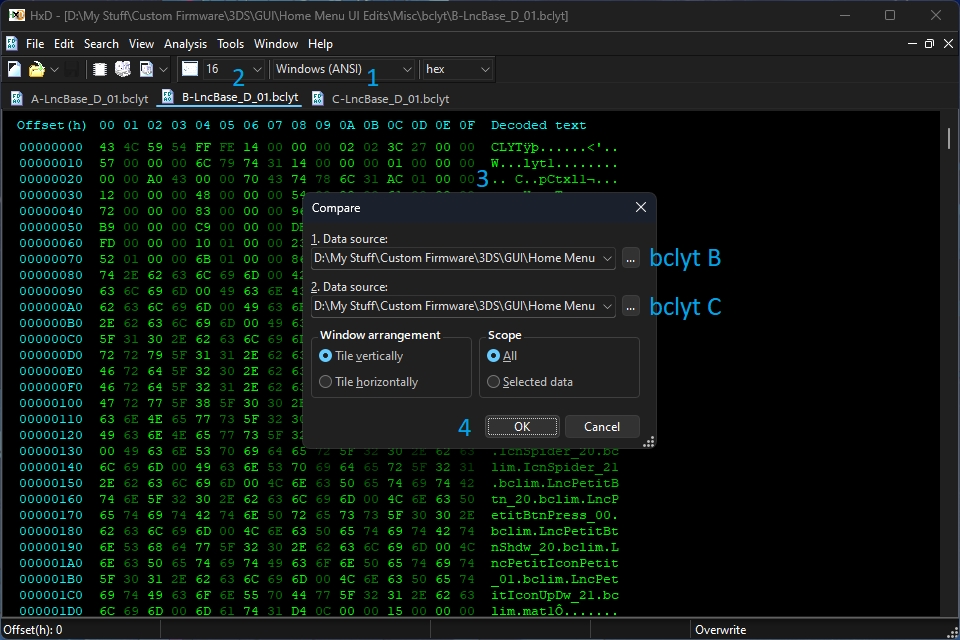
-
Click the Maximise button on one of the MDI windows.

-
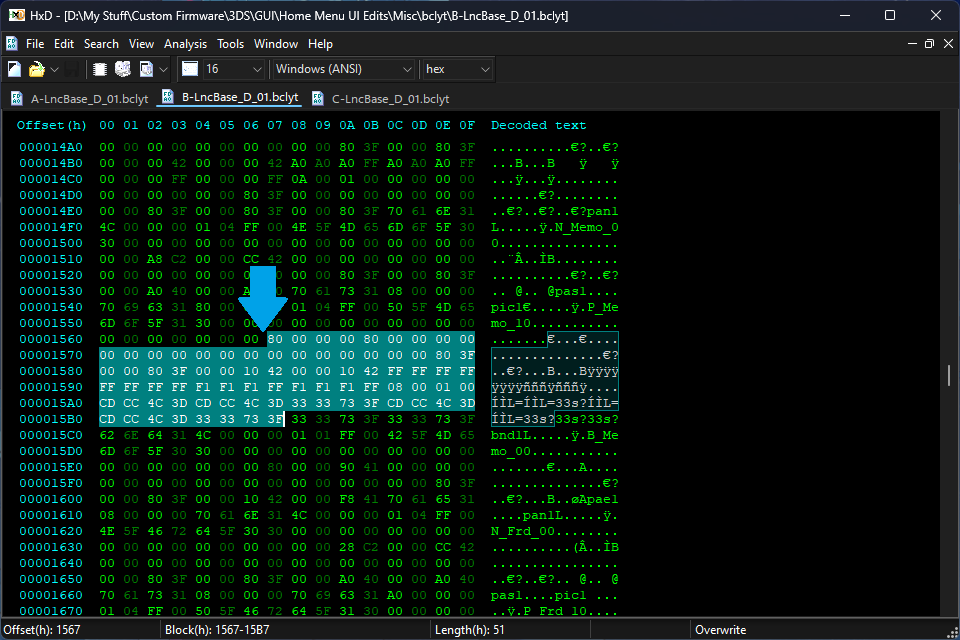
Go to the
B.bclyttab. -
Position the cursor before the selected byte (ex:
0x1567). -
Select a few lines of bytes forward (ex: from
80to3F). -
Copy it.
-
Go to the
A.bclyttab. -
Press
Ctrl+Fto find. -
Go to the
Hex-valuestab. -
Paste into the
Search forbox and clickOK. Make sure that there is only 1 result by clickingAllandSearch all. If it yields multiple results, try selecting more bytes on theB.bclyttab.
-
Position the cursor before the selected bytes (ex:
0x1717).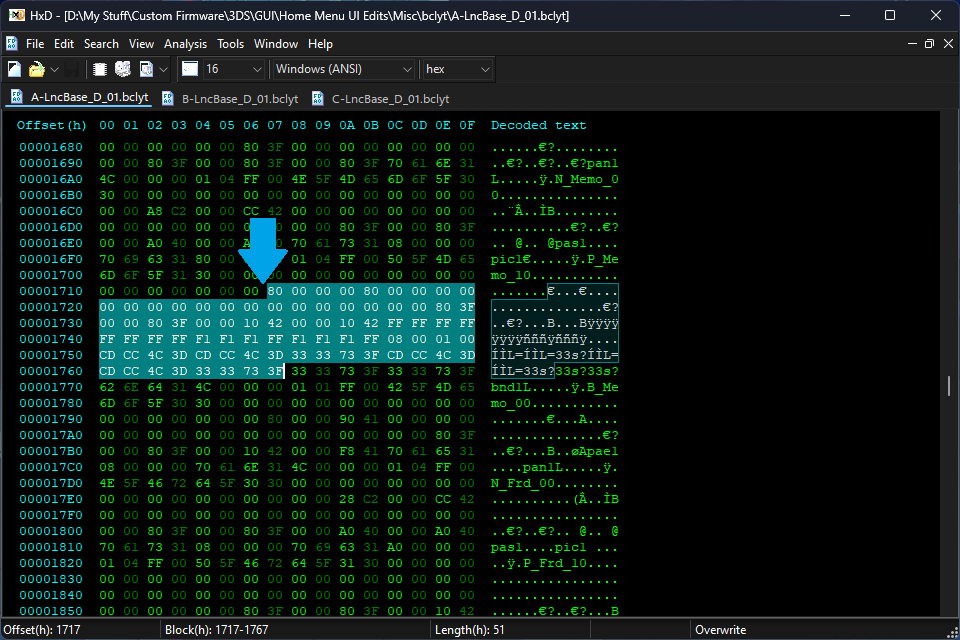
-
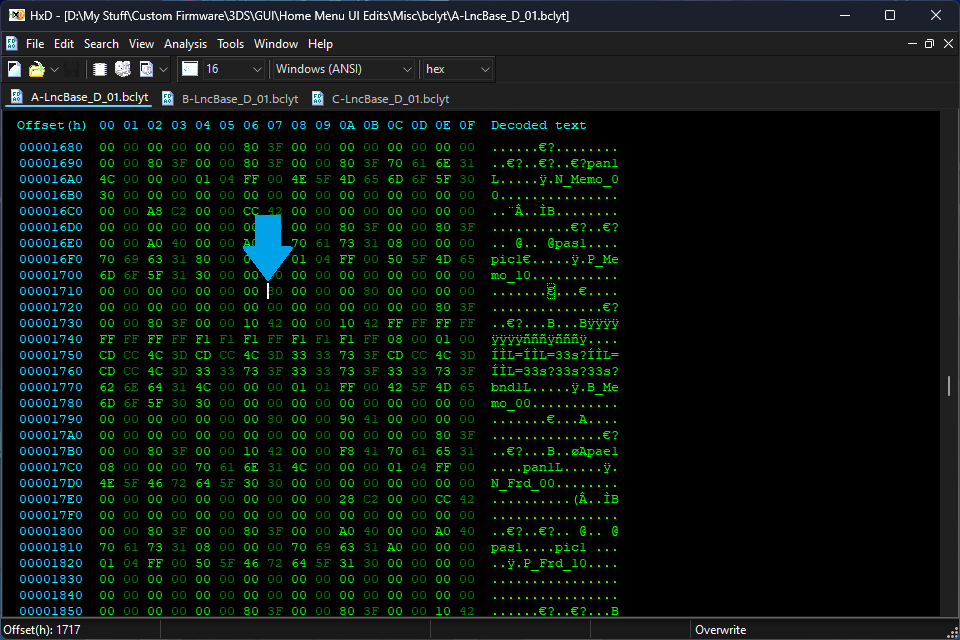
Click to deselect.
-
Select the bytes from here, all the way to
0x0by pressingCtrl+Shift+Home. -
Copy it.
-
Go to the
C.bclyttab. -
Same as before: Position the cursor before the selected byte (ex:
0x1567). -
Click to deselect.
-
Select the bytes from here, all the way to
0x0by pressingCtrl+Shift+Home.
-
Paste with
Ctrl+V. Don’t paste-overwrite withCtrl+B.- The bytes at the beginning of the edited BCLYT file are restored.
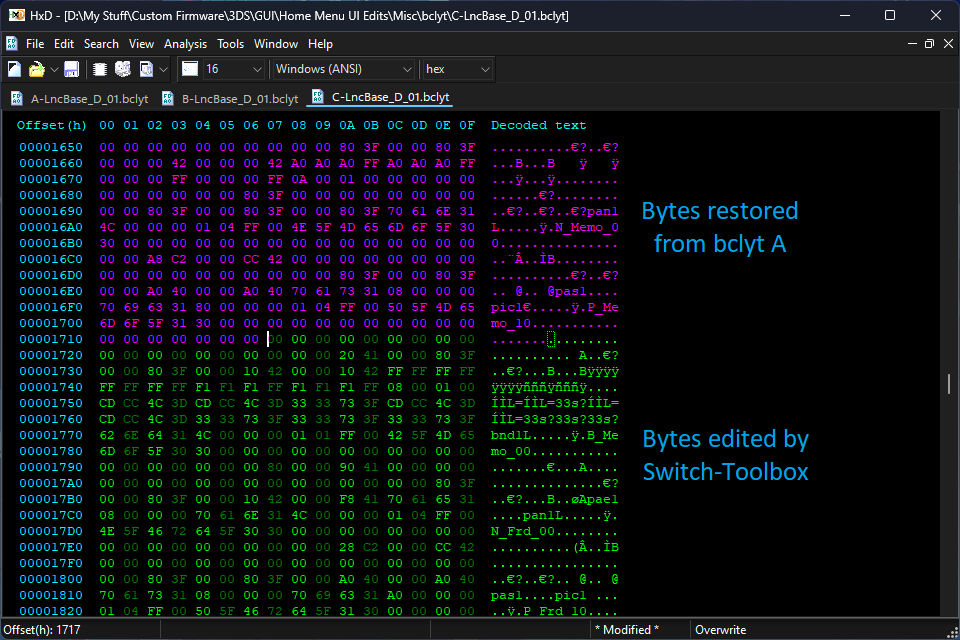
-
If done correctly, save it and close HxD.
-
Now we have fixed the BCLYT file!
-
The
A.bclyt,B.bclytandC.bclyt.bakfiles can be deleted as they’re not needed anymore. -
To make another edit to the fixed BCLYT file, make 3 copies of the
C.bclytfile and repeat step 5 of the Editing the UI Layout section.
Click the screenshot for full view. -
-
Go back to Kuriimu2.
-
Right-click the BCLYT file you extracted earlier.
-
Select
Replaceand pick theC.bclytfile (notC.bclyt.bak). -
Save.
-
Compress the
*.LZfile and that’s it! You can now apply your edited UI to the Home Menu on your 3DS using LayeredFS.
UI Element Colours
After importing the BCLYT/BCLAN/BCLIM files into the *.LZ files with Kuriimu2,
the offsets for the colour values are no longer the same, as these values have
been moved to different addresses. If you did that already, you have to hex-edit
the BCLYT files instead.
Each value consists of 4 bytes for colour & alpha (RR GG BB AA). I suggest
changing only the RGB values.
Applets - launcher.LZ/blyt/LncBase_D_01.bclyt
| Applet icon | Colour 1 | Colour 2 |
|---|---|---|
| Game Notes | 0x878 #DBBD00 |
0x87C #FFC600 |
| Friend List | 0x79C #FB7A18 |
0x7A0 #F39900 |
| Notifications | 0x6C0 #00B294 |
0x6C4 #00DA9C |
| Internet Browser | 0x5E4 #4575FA |
0x5E8 #1290FF |
| Miiverse | 0x508 #30B70E |
0x50C #49E415 |
HUD - hud.LZ/blyt/HudMenu_00.bclyt
| HUD element | Colour |
|---|---|
| Battery - Normal? | 0x248 #32FFFF |
| Battery - Normal | 0x724 #23AAE6 |
| Battery - Low | 0x738 #F57D41 |
| Battery - Charging | 0x7F4 #F57D41 |
| Battery - Charger icon | 0x888 #323232 |
| Battery - Charger BG | 0x8F8 #FF732E |
| Battery - Fully charged | 0x8E4 #23AFE6 |