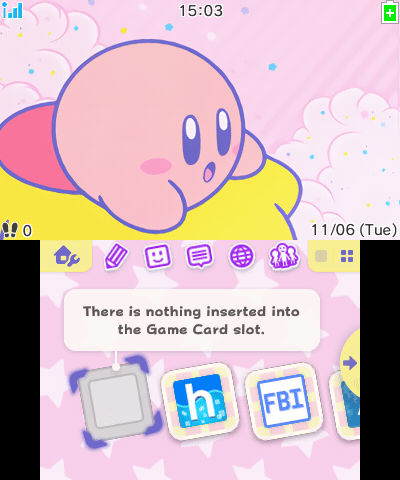
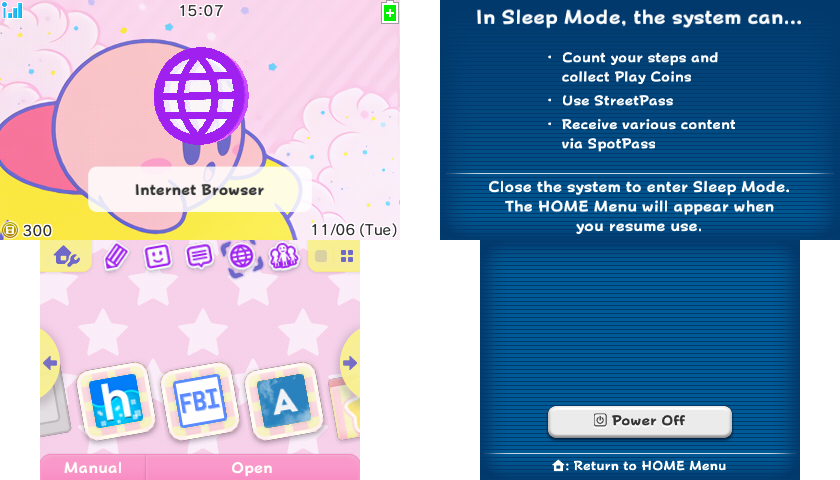
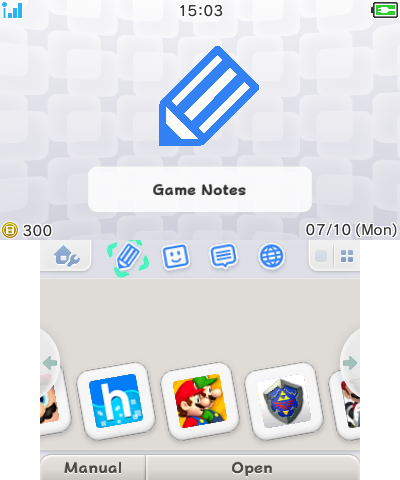
3DS - Custom Home Menu UI
The custom Home Menu UI for the Nintendo 3DS.
Check out the Home Menu UI Layout Customization Guide for creating your own customized Home Menu UI for 3DS!
Kitsune’s Custom Home Menu UI
A customized Home Menu UI made by me.
Target system firmware version: 11.17.0-50
The system font is a separate system file. To install the custom system font, go here.
Last updated: 2024-05-23
Download mod:
Installation Method 1: LayeredFS
Adding the Home Menu Applet Patch (3DS)
Luma3DS custom firmware is required to use the mod. Install CFW if you haven’t already.
LayeredFS patching is unstable for applets which causes Home Menu to randomly crash if Home Menu is opened several times
(by suspending a game or exiting an applet).
Consider using the CIA file method for now.
LayeredFS method can be used on Lime3DS emulator without any crashes.
You can add my RomFS assets to your Home Menu mod, be sure to credit me if you're gonna share your combined mod anywhere :)
-
Unpack the downloaded archive file and enter the
LayeredFS
folder. -
Enter a folder matching your console region.
-
Copy the
luma
folder to the root of the SD Card. -
Launch the Luma3DS config by holding the
Select
button while booting. -
Activate “Enable game patching”.
-
Save and exit.
-
The custom Home Menu UI has been installed.
Adding the Home Menu Applet Patch (Lime3DS)
You can also add the Home Menu applet patch to Lime3DS emulator.
AES Keys are required to install encrypted contents to Lime3DS.
Read here for more info.
If you have Citra emulator, the installation process works the same.
-
Launch Lime3DS emulator.
-
Go to
Emulation
→Configure...
→System
. -
Under the
3GX Plugins Loader
options, pick the system model and system region, then clickDownload
. -
Wait for the system firmware download to complete.
-
Close the configuration window.
-
Go to
File
→Open Lime3DS Folder
. -
Go to
/load/mods
. Create folders if those don’t exist. -
Unpack the downloaded archive file and enter the
LayeredFS
folder. -
Go to
/[region]/luma/titles
. -
Copy the
000400300000??02
folder to themods
folder. -
Launch the Home Menu by going to
File
→Boot Home Menu
→EUR
/USA
/JPN
. -
The custom Home Menu UI has been installed.
Removing the Home Menu Applet Patch
-
Launch GodMode9.
-
Go to
SDCARD:/luma/titles
and delete the000400300000??02
folder.-
EUR:
0004003000009802
-
JPN:
0004003000008202
-
USA:
0004003000008F02
-
-
Reboot the console.
-
The Home Menu UI has been restored.
-
If you want to turn off the mod instead, while leaving other patches (such as Pretendo Network) active, rename the
000400300000??02
folder to000400300000??02_off
. -
To restore the Home Menu UI on Lime3DS, go to
/load/mods
and delete the000400300000??02
folder. If you want to turn off the mod instead, rename the000400300000??02
folder to000400300000??02_off
.
Installation Method 2: CIA File
Backing Up the Home Menu Applet
Luma3DS custom firmware is required to use the mod. Install CFW if you haven’t already.
It is recommended to backup your Home Menu applet as you'll be able to restore it later on if the custom Home Menu applet is installed with the CIA file.
-
Launch GodMode9.
-
Press the
Home
button. -
Select
Scripts...
→GM9Megascript
→Miscellaneous
→Title Options
→Dump HomeMenu to .cia
. -
Proceed dumping this system applet.
-
Answer “No” if asked to decrypt the CIA file.
-
The
homemenu.cia
file is saved toSDCARD:/gm9/out
. Copy that file to a safe place in your computer.
Installing the Custom Home Menu Applet
Create a NAND backup before modifying any system files!
Make sure you have a backup of the Home Menu applet before proceeding.
Modifying the Home Menu applet is safe and can be restored by re-installing the original Home Menu applet, instead of restoring a NAND backup.
To restore the Home Menu applet, see the
restore section.
System Update will fail if the custom Home Menu applet is installed.
To update your system, you must restore the Home Menu applet back to its original state.
After a system update, backup the homemenu.cia
file again in case the Home Menu is also updated.
The current Home Menu mod is likely compatible with the future system firmware versions with a newer Home Menu version.
If this mod stops working, I will update the base Home Menu applet for this mod.
Note: The CIA file must be installed with GodMode9. Do not install it with FBI,
the installation will fail as the Home Menu applet is being used by other processes.
Never uninstall CFW while any modded system files are installed, doing so will brick the console! A
DS flashcart with ntrboot
is required to re-install B9S.
Modified system files are not signed which they don't work on the original firmware, as the signature check fails.
If you wanna uninstall CFW before selling your console, you must restore the system files first, then follow the
CFW uninstallation instructions.
-
Add the downloaded CIA file to the SD Card.
-
Launch GodMode9.
-
Browse and select the CIA file.
-
Select
CIA image options...
→Install game image
.- CIA files are already encrypted, so there’s no need to.
-
Reboot the console.
-
The custom Home Menu applet has been installed.
Restoring the Home Menu Applet - Method 1
If you've dumped the homemenu.cia
file with GodMode9, follow this section.
-
Launch GodMode9.
-
Go to
SDCARD:/gm9/out
and select thehomemenu.cia
file. -
Select
CIA image options...
→Install game image
. -
Reboot the console.
-
The Home Menu applet has been restored.
Restoring the Home Menu Applet - Method 2
If you've lost the homemenu.cia
file from your SD Card and computer, follow this section.
The target system firmware version is 11.17.0-50
.
-
Download the original Home Menu applet:
-
Obtained from Darthsternie’s Firmware Archive
-
Add the
HomeMenu_???.cia
file to the SD Card. -
Launch GodMode9.
-
Browse and select the
HomeMenu_???.cia
file. -
Select
CIA image options...
→Install game image
. -
Reboot the console.
-
The Home Menu applet has been restored.
Restoring the Home Menu Applet - Method 3
If you've installed the custom Home Menu applet to your system running on older firmware version without any backups, follow this section.
-
Download the firmware archive matching your console region and current firmware version.
-
If you don’t know your system’s current firmware version and can’t boot to Home Menu:
-
Launch GodMode9
-
Go to
CTRNAND:/title/000400db/00017?02/content
.-
EUR:
00017102
-
USA:
00017302
-
JPN:
00017202
-
-
Select the
.app
file. -
Select
NCCH image options...
→Mount image to drive
. -
Answer “Yes” to browse inside the
.app
file. -
Go to the
romfs
folder. -
Open the
titleversion.txt
file with hex editor or text viewer. -
Take a note of the firmware version.
-
-
Unpack the firmware archive and find the
.cia
file for Home Menu inside theupdates
folder.-
EUR:
0004003000009802.cia
-
USA:
0004003000008F02.cia
-
JPN:
0004003000008202.cia
-
-
Rename the
000400300000??02.cia
file toHomeMenu.cia
. -
Place it in the SD Card.
-
Launch GodMode9.
-
Browse and select the
HomeMenu.cia
file. -
Select
CIA image options...
→Install game image
. -
Reboot the console.
-
The Home Menu applet has been restored.
-
(Optional) Update the CFW and system firmware to the latest version.
Restoring the Home Menu Applet - Method 4
If you have any issues downloading the firmware archive, follow this section.
-
Download 3DNUS.
-
Launch 3DNUS.
-
Input your system’s current firmware version and region (ex:
11.17.0-50E
). -
Click “New 3DS” or “Old 3DS” for your 3DS system model.
-
Click “Begin Download”, and wait for the download to complete.
-
Enter the firmware folder and find the
.cia
file for Home Menu inside theupdates
folder.-
EUR:
0004003000009802.cia
-
USA:
0004003000008F02.cia
-
JPN:
0004003000008202.cia
-
-
Rename the
000400300000??02.cia
file toHomeMenu.cia
. -
Place it in the SD Card.
-
Launch GodMode9.
-
Browse and select the
HomeMenu.cia
file. -
Select
CIA image options...
→Install game image
. -
Reboot the console.
-
The Home Menu applet has been restored.
Restoring the Home Menu Applet - Last Resort
If none of those restoration methods work for you, restore your NAND backup or give CTRTransfer a try.
The CTRTransfer method will re-install all the system files and temporarily downgrade the firmware version to 11.15.0
.
Your games and their save data will not be lost in the process, so follow the instructions carefully.